
How to Add Products on Your Haulistic-Powered Website: A Complete Seller's Guide
Managing an online store requires efficient product management, and Haulistic makes this process straightforward with its intuitive seller dashboard. Whether you're launching your first product or expanding your existing catalog, this comprehensive guide will walk you through every step of adding products to your Haulistic-powered website.
Getting Started: Accessing Your Seller Dashboard
After logging into your Haulistic-powered website, you'll immediately see your seller dashboard. This central hub gives you complete control over your online store operations. The dashboard features a well-organized left panel with various sections designed to streamline your selling experience.
Navigating to Product Management
In the left panel of your dashboard, you'll find multiple sections for different aspects of your store management. Look for the "Products" section, which is your gateway to inventory management. Click on "All Products" to access your product management area.
Once you're in the products section, you'll see a clean interface that displays your existing products (if any) and prominently features a prompt asking you to add a product. This user-friendly design ensures that even first-time sellers can quickly understand how to expand their inventory.
Starting Your Product Creation Journey
Click on the "Add Product" prompt, and you'll be taken to a comprehensive product creation page. This full-featured interface is designed to capture all the essential information needed to showcase your product effectively to potential customers.
Essential Product Information
Basic Product Details
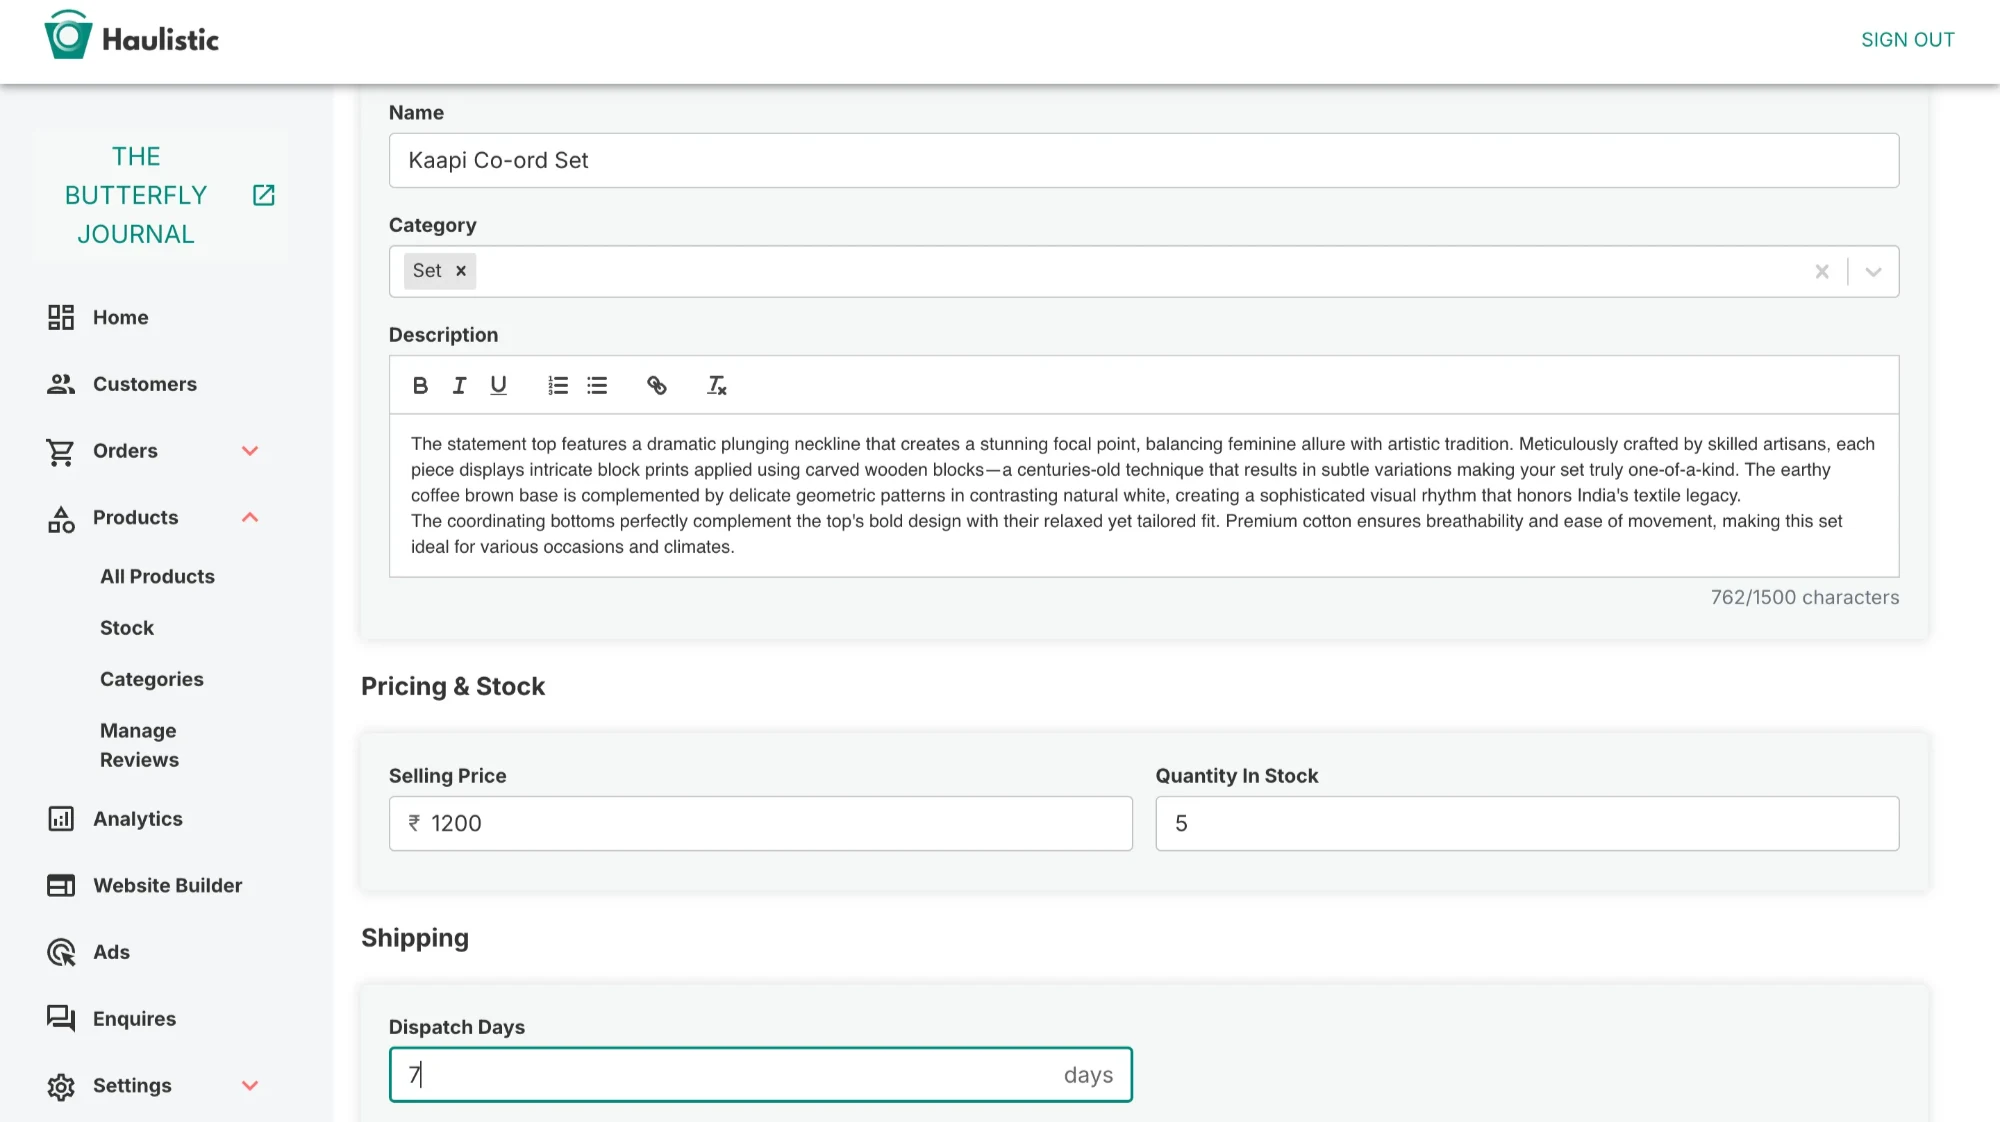
Your product creation journey begins with the fundamental information that customers need to understand what you're offering:
Product Name: Choose a clear, descriptive name that accurately represents your product. This will be the first thing customers see, so make it count.
Category Selection: Properly categorizing your product helps customers find it through browsing and filtering options. Select the most appropriate category that aligns with your product type.
Product Description: Craft a compelling description that highlights your product's features, benefits, and unique selling points. This is your opportunity to convince potential customers why they should choose your product.
Pricing and Inventory
Selling Price: Set your product's price competitively while ensuring profitability. Consider market research and your costs when determining the optimal price point.
Stock Availability: Accurately input your current inventory levels. This information helps prevent overselling and maintains customer trust by showing real-time availability.
Shipping Configuration
In the shipping section, specify the number of days required to dispatch your product. This information sets clear expectations for customers regarding delivery timelines and helps build trust through transparency. Accurate dispatch times are crucial for customer satisfaction and can influence purchasing decisions.
Visual Product Presentation
Image Management
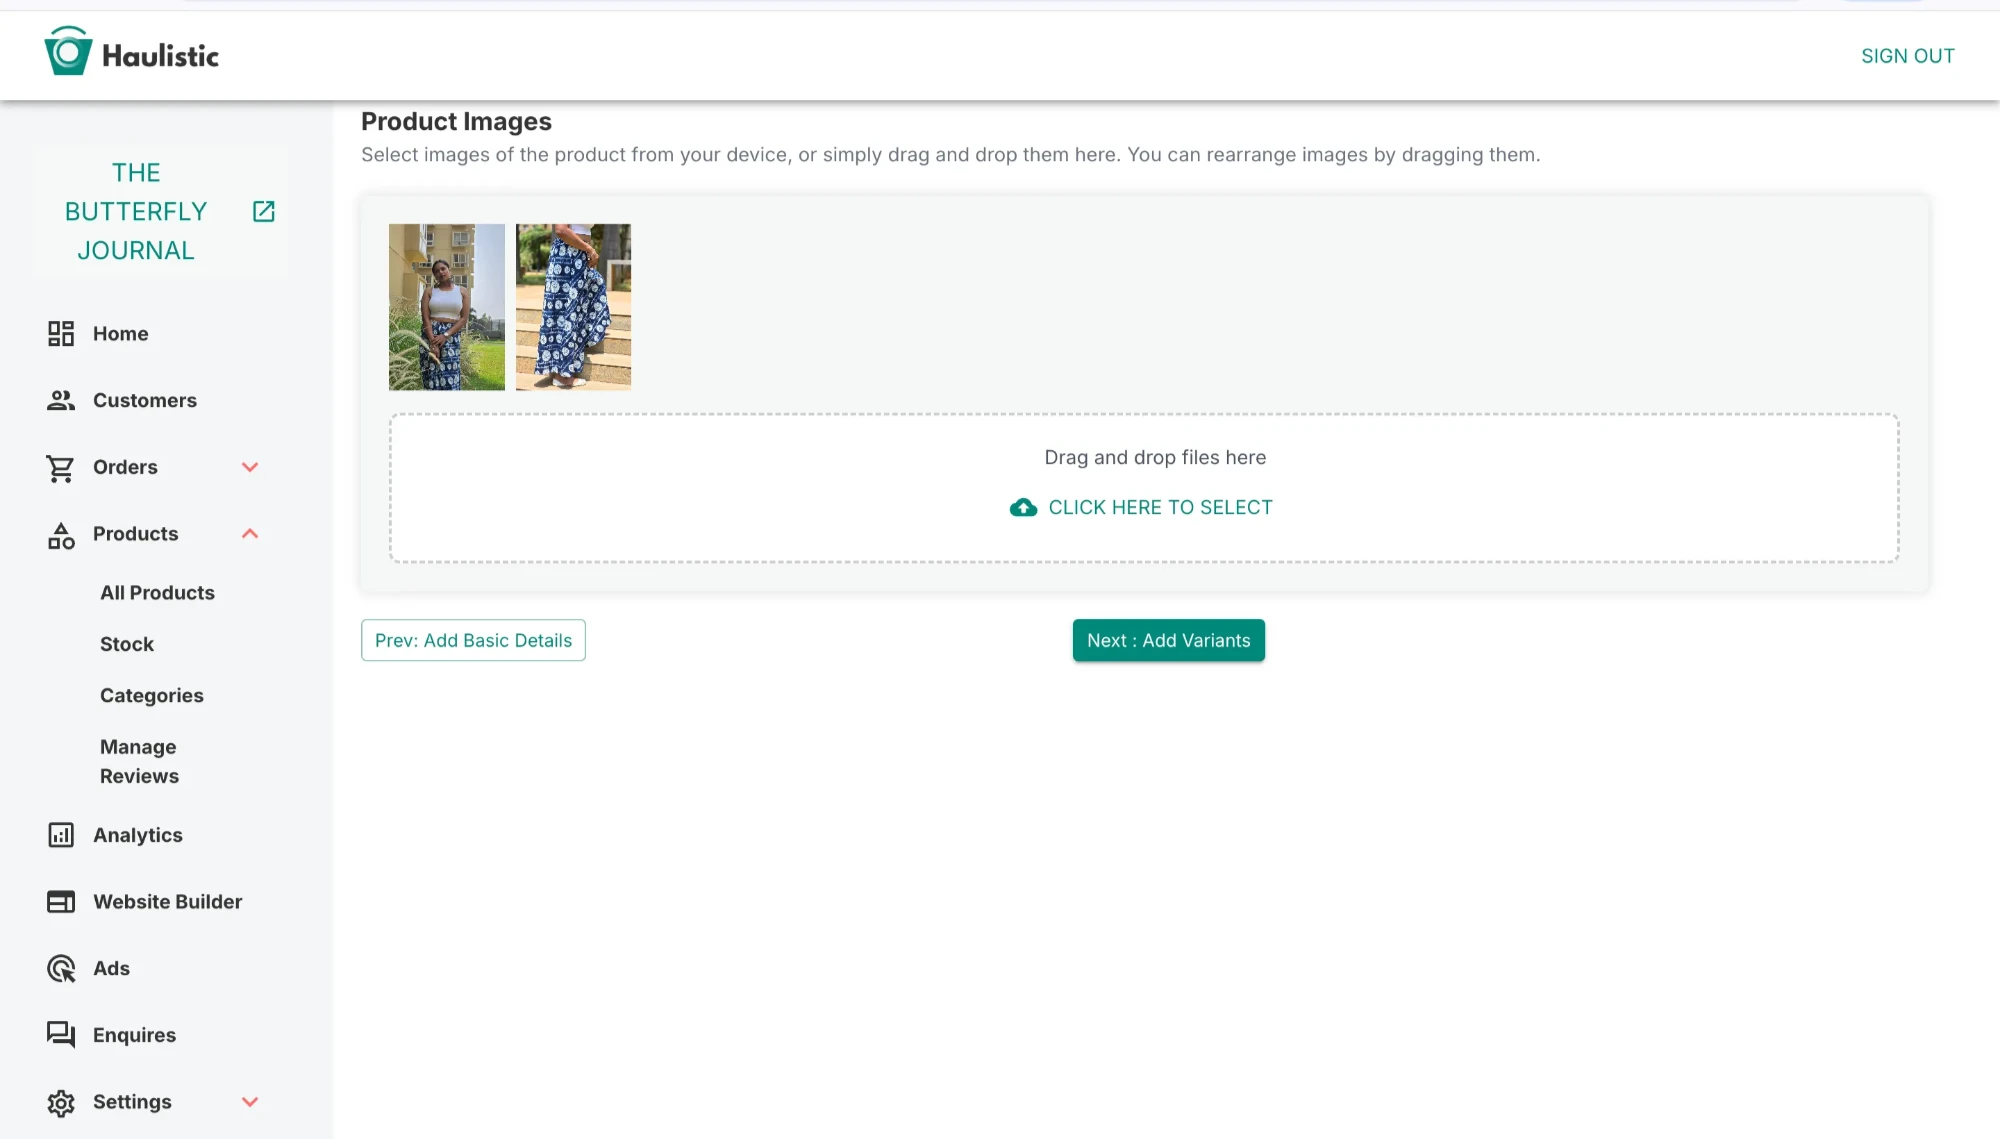
Below the basic information section, you'll find a prompt to add product images. Clicking this opens a dedicated image management page where you can upload multiple product photos using either:
- Drag and Drop: Simply drag your image files from your computer directly onto the upload area
- File Selection: Click to browse and select images from your computer's file system
Image Organization and Editing
The platform provides powerful tools for managing your product visuals:
Image Arrangement: You can easily arrange and rearrange your uploaded images to control the display order on your website. The first image will serve as your primary product photo, so choose wisely.
Image Cropping: Built-in cropping tools allow you to optimize your images for the best presentation, ensuring they display perfectly across different device sizes and layouts.
Product Variants and Customization
Creating Variants
For products that come in different options, the variant system allows you to offer multiple choices:
Variant Types: Add variants such as size, color, material, or any other distinguishing features your product offers.
Variant Configuration: For each variant type, you can:
- Add a descriptive variant name
- Input specific values (e.g., Small, Medium, Large for sizes)
- Designate variants as primary or secondary based on their importance
A complete guide to explaining the primary and secondary variants: Here
Variant Pricing and Inventory
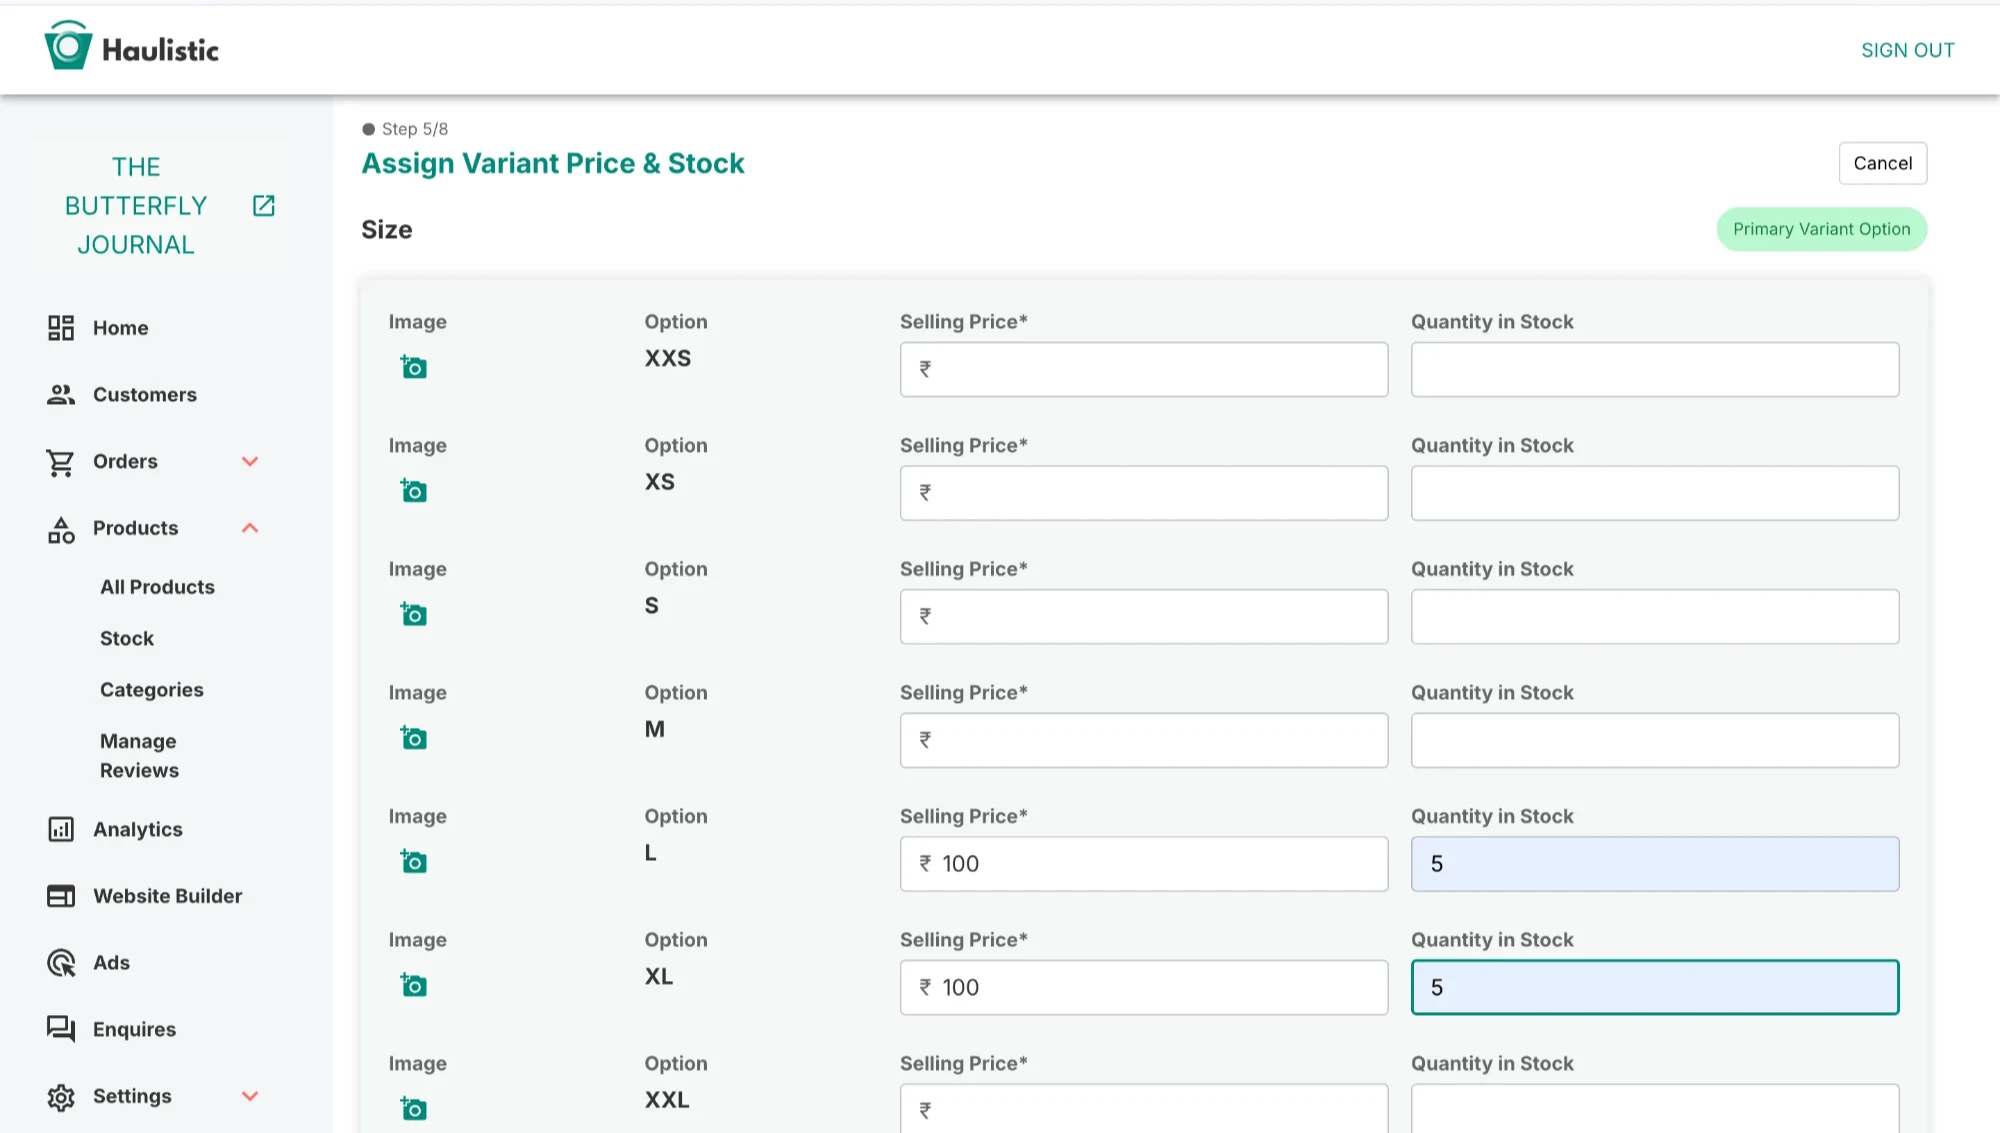
Each variant can have its own specific pricing and stock levels:
Individual Pricing: Set unique prices for different variants. For example, if you're selling a shirt with sleeve options, you can add additional charges for long sleeves compared to short sleeves.
Stock Management: Track inventory separately for each variant to maintain accurate availability information.
Additional Pricing: When certain variants require extra materials or processing, you can easily add surcharges while maintaining transparency with customers.
Enhanced Product Features
Product Notes
The notes section provides space for additional product information that doesn't fit into the standard fields. Use this area for care instructions, warranty information, or other relevant details that enhance the customer experience.
Product Tags and Marketing
The tagging system helps with product discoverability and marketing:
Promotional Tags: Add tags like "New Launch" or "Bestseller" to highlight special products and attract customer attention.
Search Optimization: Strategic tagging improves your product's visibility in search results and category browsing.
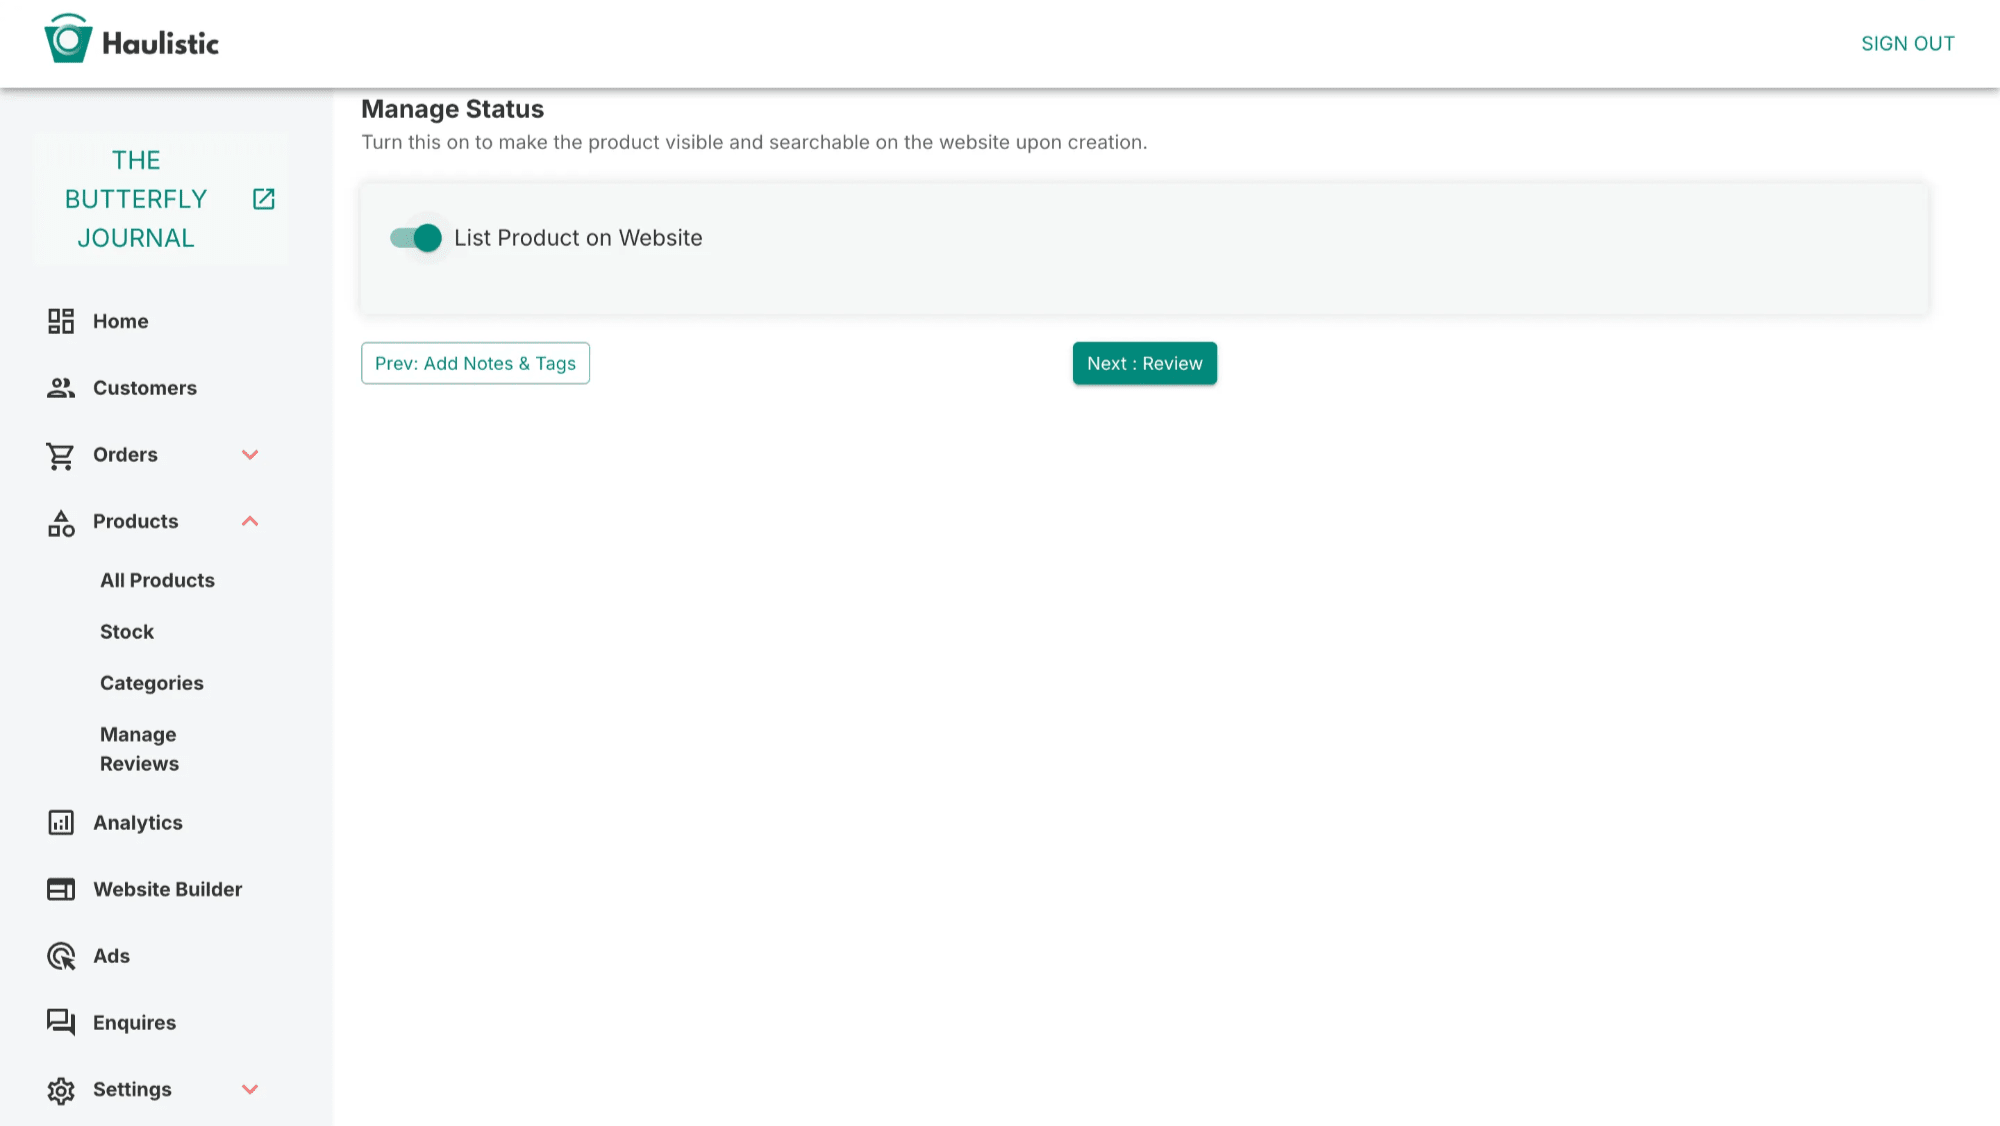
Product Status Management
Going Live
Once you've completed all the product information, you have control over when your product becomes visible to customers:
Status Control: You can manage whether your product is live on the website or remains in draft mode for further editing.
Preview Function: Before making your product live, use the review feature to see exactly how it will appear to customers on your website.
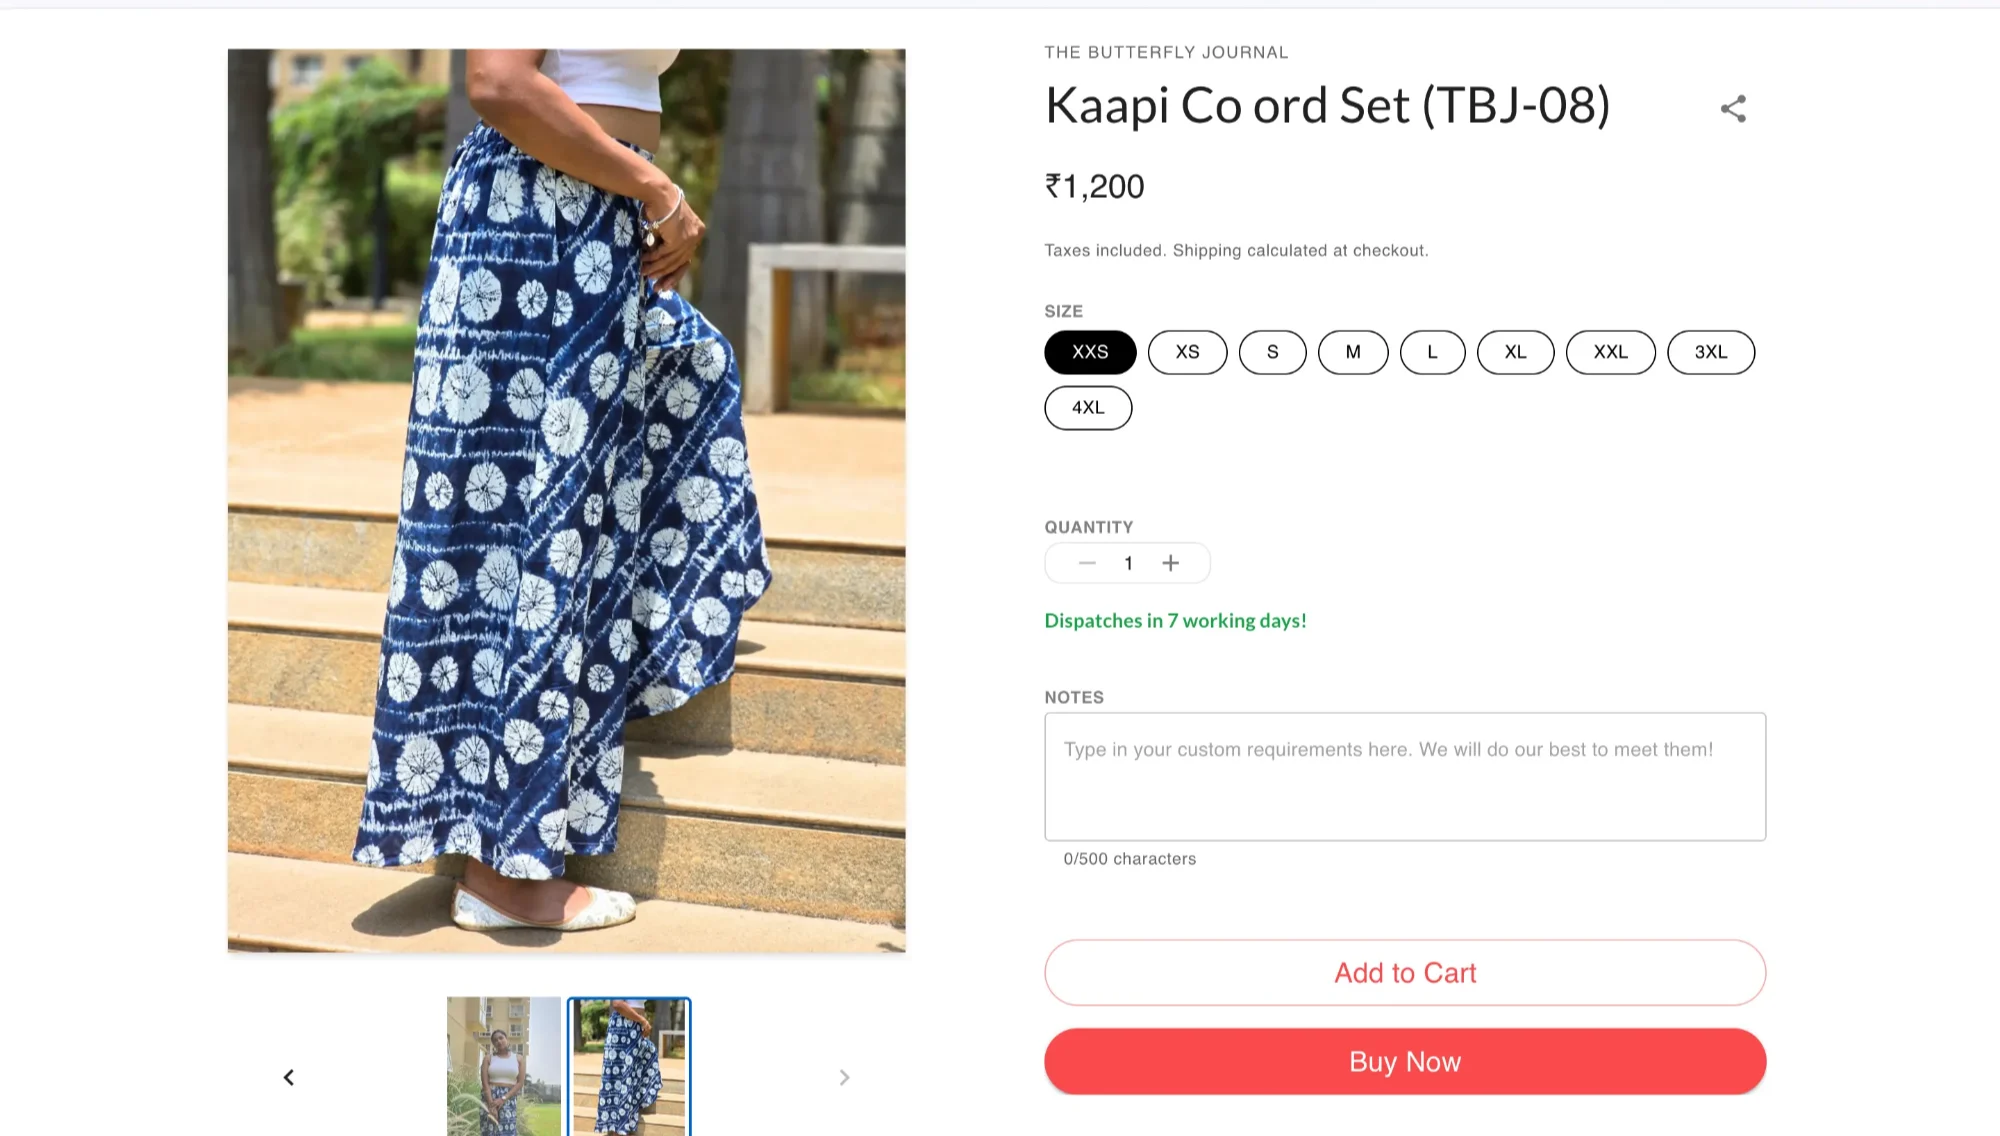
Final Review and Launch
The platform allows you to preview your product's display, ensuring everything looks perfect before customers see it. This preview function shows you exactly how your product will appear on your website, including images, descriptions, pricing, and variant options.
When you're satisfied with how everything looks, simply change the product status to "live," and your product will immediately become available for purchase on your website.
Conclusion
Adding products to your Haulistic-powered website is designed to be intuitive and comprehensive. The platform's user-friendly interface guides you through each step while providing powerful features for customization and management. From basic product information to complex variant configurations, every tool you need is readily available in your seller dashboard.
By following this guide and utilizing all the features available, you'll be able to create compelling product listings that attract customers and drive sales. Remember that successful online selling is an ongoing process of optimization and refinement, so don't hesitate to update and improve your product listings based on customer feedback and sales performance.
Your Haulistic-powered website provides all the tools necessary for e-commerce success – now it's time to put them to work for your business.
Guide details
Reading time
5 min read
Published
July 4, 2025
Topic
Products